The seats are out. The floor is up. I do feel like listening to Lionel Richie and “dancing on the ceiling.” After all, there’s only the ceiling and walls to deal with before the bus is gutted!

In theory, it sounded simple enough to me. It was just a matter of unscrewing the 1500+ screws with the power drill and pulling out the sheet metal. In practice, it is much more challenging. Come to think of it, every process, project, task, or step is a lot more challenging than one would guess when pertaining to this bus. Bart and I were able to remove most of the screws from the ceiling before we had the seats out. We didn’t have a way to get the seats out so we figured, why not start on the many small screws that need to be removed sometime soon.
Screw Removal – Part 1
First, let me describe how I removed these screws. Though I consider myself fit and strong-ish, holding a drill above your head for an hour or more is no easy task. Then press with all of your body weight and arm strength against each screw. If you don’t, the screw will strip and then you’ll have an even bigger challenge on your hands. To remove the screws (while the seats were still in), I would sit on top of a seat and wedge my knee into my tricep and push into the screw. It was about 95 degrees Fahrenheit in the bus. Hell? Yes, it was. Luckily, we removed most of these quite some time ago. Once the floors were removed nearly a month later, we only had a row or two of screws and those damned stripped screws.
Screw Removal – Part 2
To remove the stripped screws, you use a pry bar. We tried to grind them off, but they were thick and it took longer than the pry bar, was more dangerous than the pry bar, and hotter because you had to wear layers. Bart suffered two hand injuries, which he said looked worse than they felt. I have incurred a number of hand blisters and cuts and what feels like tendonitis in the hands, forearm area, and wrists. It’s not bad, but it’s harder to climb because I get pumped out quickly and I can’t pick up the cast iron skillet or my water flask without two hands. 😦
Removing the Wall Panels
After removing the screws from the wall, I sawed through the sheet metal below the window panes with the angle grinder. It turns out that you can’t just pull out the sheet metal in the wall. Why do some blogs make it look so easy?!? In practice, I found out that you must cut through the sheet metal. There is really no other way if you plan on removing the walls and existing insulation. So I would cut through the sheet metal and fold it up into little sheet metal sandwiches to take to the scrap yard. The walls, in hindsight, were less tough than the flooring, but by time I worked out a process, it was completed. That’s a frustrating thing about this project: you master something and then… it’s over!


Regardless of everything I’ve written above, I am enjoying this conversion process. My expectations for the difficulty in nailing down a process for each step were unrealistic. Now that I’ve been humbled and brought back to reality, we can continue with this project in a rather peaceful way (I hope).
The ceiling and floor came along much the same way, minus the angle grinder. I’m not a fan of holding an angle grinder above my head, you know, to keep all my digits, extremities, and such in place 😉 Bart handled prying off most of the ceiling panels and I pried and cut out the wall panels. One snag: the front-most ceiling panel was held hostage by the camera box, the hydraulic door device, the side-window panels, a fuse box, and probably a few other things. I had to remove each of those before I could remove the ceiling panel. It wasn’t very difficult, but there were all different size screws and bolts, which kept me on my toes.


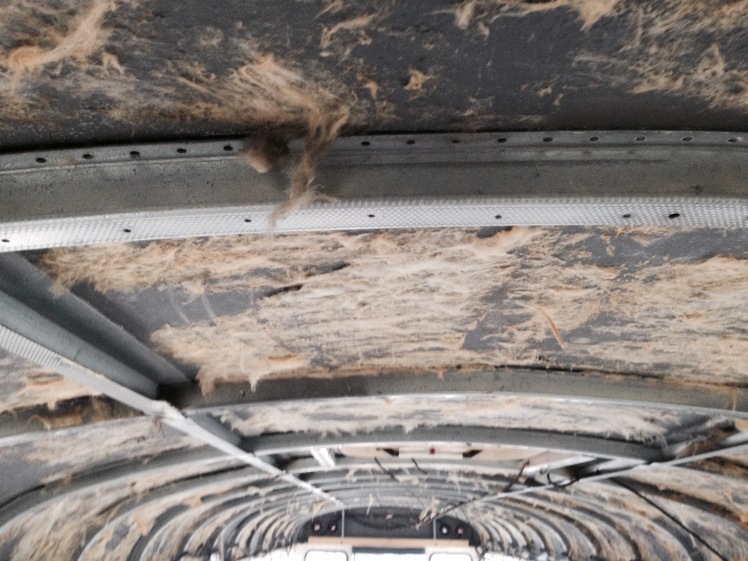
Once the ceiling and wall panels were removed, I went through and removed all of the existing fiberglass insulation.
Types of Insulation
We still haven’t exactly decided our insulation material(s) yet, but I’m thinking rigid foam insulation for the subfloor and mineral wool for the walls and ceiling. The other top contenders for the walls and ceiling will be cellulose and spider insulation. Mineral wool is affordable, eco-friendly, impervious to water, and lightweight, which is why it’s our top choice. Mineral wool is a by-product of the processing of glass, ceramics, and minerals. The only point of contention for me is that formaldehyde is used to treat mineral wool; though, supposedly, none of this remains in the final product. Spider insulation, a sprayed fiberglass insulation, is my top choice is money didn’t matter. It has a fairly high R-value, is lightweight, and uses 30-40% recycled glass. Cellulose is a recycled paper insulation (~ 90% recycled materials), which is sprayed onto walls and ceilings to insulate. it’s a bit heavier than both mineral wool and spider insulation. It is also been rumored to trap moisture, possibly leading to mold growth. Maybe I will go with spider insulation.
I found this link and embedded table to be helpful. It didn’t occur to me that brick, tile, sheathing, and wood panels also insulated. Of course, once someone else pointed this out, it struck me as obvious.
http://www.archtoolbox.com/materials-systems/thermal-moisture-protection/rvalues.html
You might be wondering what the next steps are. Treating the rust on the floor and undercarriage and then raising the roof! We have made some pretty exciting developments over the last week or two. I hope the floor will be repaired within the next week and then the roof raised the week after.
The “Ever-Expanding” Project List
This list will grow, I suspect. Here is the outstanding to-do list in a somewhat prioritized list. Please comment if you see anything missing!
| Remove Floor |
| Chassis Rust Removal |
| Repair Floor |
| Raise Roof |
| Smugglers Hatch |
| Subfloor |
| Side Sheet Metal |
| Windows |
| Paint Exterior |
| Framing |
| Electrical |
| Plumbing |
| Install Insulation |
| Front Door |
| Floor Boards |
| Wall Boards |
| Ceiling Boards |
| Paint Interior |
| Rafters |
| Bathroom Walls |
| Garage Walls |
| Refurbish Stairs |
| Kitchen Cabinets |
| Kitchen Countertops |
| Composting Toilet |
| Wooden Engine Cover |
| Brick Wall |
| Tile Wall |
| Barn Door Track |
| Build & Install Kitchen Sink |
| Install Wood Burning Stove |
| Gray Water Tank |
| Fresh Water Tank |
| Shower Curtain & Rod |
| Install Sink Faucet |
| Install Shower Faucet |
| Wash Tub Tables (2) |
| Shoji Doors (2) |
| Foldout Tables (2) |
| Futon |
| Living Room Shelves |
| Reupholster Chair |
| Kitchen Shelves |
| Horse Trough |
| Horse Trough Table Cover |
| Speakers |
| Solar Lights |
| Solar Absorption Refrigerator |
| Solar Water Heater |
| Solar Oven
What are your thoughts on insulation types, costs, and benefits? Share your feedback in the comments section or send me an email. |
